

Choice Boards!
/First The Why followed by a prek/Kindergarden and 1st grade choice board ideas! More to come!
https://view.genial.ly/6367bde9e30fd800176b89d9
Calling all Book Creators!
/It’s all about the creative author in Book Creator!
Want a step-by-step guide on how to create in Book Creator explore my remix, here: Book Creator
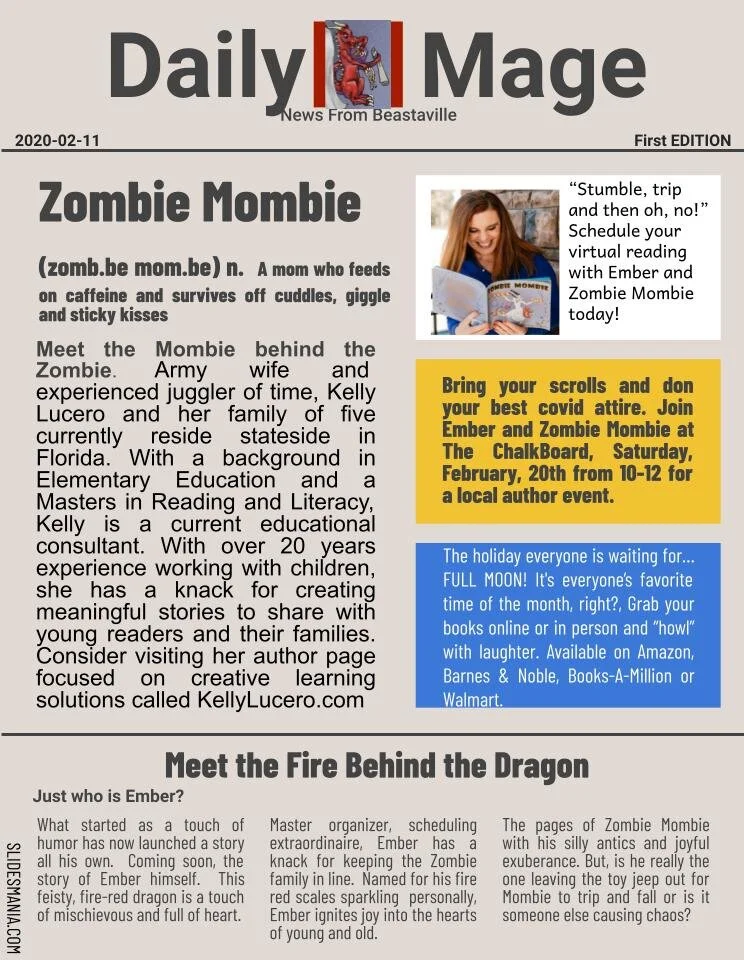
Questions for Zombie Mombie?
/Questions for Zombie Mombie? Post them below and you could be featured!
Now, Pause for a 📕 💃 Break!!! Join the fun!!


Santa's Little Helpers!
/
https://www.uspsoperationsanta.com/letters
https://about.usps.com/holidaynews/operation-santa.htm
Last year our family were little shopping elves for Christmas. If you are looking for a way to give back and adopt an anonymous child from across the US, here's an option for you. Or if you know a family that needs to be adopted, click on the second link for directions on where to send letters. We looked today and everyone has been adopted for now, so the Lucero elves will check back tomorrow.
Holiday Advent Academy
/
We invite you to join the fun with our holiday Advent Academy! Each box reveals a family fun activity and a kindness challenge.
National Read a Book Day
/
Grab your snuggle blanket, a cup of tea and your newest book, today is National Read a Book Day! Are you a family of readers? Do you have a special book to share? Comment below and share in the magic of books! Our current family reads:
Kelly: The Wife Stalker
Chris: The Artist’s Way
Sophia: Fellowship of the Ring
Lyra: Spirit Animals Book 2
Cayden: Dragon Masters
Today we attended two virtual baby showers, do you know what our favorite gift to give new little wee ones? Books!! The magic of books! Why? A child who’s read to learns to associate reading with love and joy. Be the adult who inspires and create magic in a young one’s life!! Crack the book and read with your little one!.
READ it’s a beautiful thing!!
Needs some tips on where to start, please feel free to reach out or check out this wonderful website for more!
Mini Cinderella Story
/
Rainy mornings are for tea parties and precious moments. Let me adjust your crown, my sweet girl and let’s get this day started!
I’m not a cinderella story (although I do have my Shrek). I wasn’t an overnight success but what I do have is grit, perseverance and ridiculous work ethic. I’ve worked hard to pave my own path pushing through the briers and swinging through obstacles.
If you’re willing, I will show you how I fit this into our lives. I will help you adjust your crown, motivate and cheer you on, sister! You are worth it! Grab that pen and paper and let’s get going.
Believe!
Achieve!
Just Breath!
Yurt Life
/
Who needs to glamp up their camping experience? The heat and humidity of Florida is intense but that didn’t stop us from camping in style. This camping trip we upgraded to #yurtlife. Three years ago we found this yurt at Torreya State Park just a short drive from Pensacola!! It’s a little hidden gem tucked away in panhandle of Florida. There was maybe a handful of other campers and oh a few critters. The camp hosts were welcoming and loads of fun to visit and the bathrooms super clean. The Yurt came with air-conditioning, two queen size bed and a twin bunked. Plus it had a table with 4 chairs. outside it had water, an electric prep area and adorable seating next to the campfire. Plus the must have picnic table. At $40 a night, it’s a great deal! For day trips we traveled to Falling Waters State Park and the Florida Caverns. Only an hour away is Tallahassee with a ton to do, as well. On our way to the park we also stopped by the springs for a cold, refreshing dip!!
Our must have YURT packing list:
To keep the bugs at bay: Meet the Bug-A-Salt, the Bug thing and our screened in porch.
The bug-a-salt lives up to its name. Flies, bees, cockroaches have all been zapped by this salt shot gun.
The Bug Thing, yes it totally looks gimmicky but it helps pull the sting away from the bite. With Fl fire ants and an evil stinging Caterpillar Cayden found, it has helped.
The Screened in Porch. The bees are buzzing around me as are the flies but I can cook in peace. Thank goodness! Plus it rained last night but the table was dry!
Ready to Write
/
Now what? You've generated ideas and you're ready to write. Organization is the key, it's time to plan! Within this post, I will explain how to successfully teach organization to ensure engagement and put the enjoyment back into writing!
Step 1: AttitudeAttitude is everything! Create a positive environment that cultivates the love of writing. Have you told yourself that you hate to write? Perhaps mentioned to others that you are a terrible writer or *gasp* writing is boring?! Stop now! Change your attitude! It's time to get real with yourself and others. You can write! Everyone is capable of unique and creative writing. Now, embrace the process.
Excitement is contagious, I am mindful of my energy whenever I teach a writing lesson. As positivity starts to flow, the ideas and creativity build. Was I always like this, is this a natural gift just for positive minded people? No, I, like many others had to cultivate and grow a confident quality. Now, this upbeat method I have for writing is contagious. Start by believing in yourself and your young learners. Get ready to unleash the creativity not only in your child's mind but yours as well. The power of positivity is infectious, and partnered with creativity is unstoppable!
Step 2: ModelModel the work you want from your students. Get out a large tablet, a writing journal or a white board (I prefer large paper so I can revisit my work later). Get ready to practice the art of writing directly in front of your learners. Seeing you embrace the process of writing will give them the notion that they too are ready to try. Your work doesn't have to be perfect, in fact the more you draft in the moment, the more kids will see how writing is a process. From cultivating ideas, organizing my thoughts, formulating sentences to editing my work, every step of the writing process is modeled in front of my kids. Seeing you write is just as important as seeing you read. Modeling any behavior is a gift for learners as they emulate your actions.
Step 3 Primary AgeFor kids age 5-7, I organize with a primary journal. In a this journal, the top is an open block for pictures while the lower half has large primary lines perfect for the beginning writer. If you don't have a primary journal, no problem, just draw a horizontal line on the middle of the page. Next, I have them place the acronym DTAP on the top left of their page. Starting off with DTAP (Date, Topic, Audience and Purpose) gives the writer a direction and reason for writing.
DTAP:
D: Date
T: Topic
A:Audience
P:Purpose
Pick a topic. As you model, choose from the list of ideas created or, if you are feeling confident, choose the first idea that comes to mind. Now, don't cheat, no planning ahead, do all of your modeling right in front of your learners. Choose an idea on the spot and go for it. Talk out loud through each step as you begin to formulate your ideas. Draw 3-5 pictures or use words on the top part of the page. Don't write on the bottom half yet, save this for the next lesson, when you write your story. Talk through each illustration as you go. After drawing some quick pictures label them 1st, 2nd, 3rd. Each number will correspond for a sentence you will write. Here is an example.
That's it, you have just demonstrated the art of expository organization for primary kids. Now, they are ready to write. Guide them through their journal, give them praise and confidence as they begin their writing journey.
Step 4 Procedural/ Expository Writing Ages 7 and up will enjoy the spaghetti and meatball, stoplight or color coded plan. The name of the plan changes for different themes I write. For instance, with my travel writing, I used airplanes and suitcases to prompt and engage learners. But, for now I will stick with spaghetti and meatballs to explain the process. "The topic sentence at the top is the plate (green). The noodles (yellow) the reason, details or facts. Meatballs (red) are to explain or give examples of each detail.(Auman, 2003)" Typically I ask my student not to stress over the outline. In fact model quickly to get your ideas down on paper. Otherwise when too many details are added, it's a challenge to rewrite. Get the gist or essence of the topic for your procedural writing project. Even spelling is not something I worry about at this time. I am more concerned with gathering and sharing their ideas in this step.
To begin this model, start with DTAP on the top left corner of the page (Date, Topic, Audience and Purpose). This gives you a clear goal for writing. Now demonstrate, choosing a topic. Again this is best done right in front of your students. Show them how to draft their organization. Start with your topic sentence then add at least three ideas. Follow with two-three examples under each main thought. Finish with a concluding sentence that revisits your topic. The writing demonstration should take no longer then 5-10 mins as you talk it through. In some cases, it could take even less time once your students get the idea of planning. Here is an example of spaghetti and meatball planning.
That's it, folks! Now, that your kids have seen you plan, let them explore the process. Perhaps give them a time limit to draft a procedural plan. For added motivation, let them choose their own topic. Remember you are trying to encourage them to write. There is plenty of time to teach children to write on topic when they become confident. But, for now get them to love the process of writing.
Step 5 Narrative WritingThe art of storytelling is captured within this plan. Building ideas with a flow chart allows students to grasp the rhythm and pattern of a traditional story. Start by building the scene with setting and characters. Then map out the story with a first event, followed by a problem. Identify the second event and explain the solution. Conclude the story by sharing a feeling or remembering a character. Yes, this plan can be a longer and more in depth but it will help frame a narrative story. Drafting a story is best, used with a prompt to organize their work. Here are a couple examples available on my Etsy site.
Again, in the top left corner I place DTAP (Date, Title, Audience and Purpose) to focus your writing. Choosing a topic is again done right in front of my learners. As I begin to plan out my story, I think out loud, demonstrating how ideas can be quickly gleaned. The entire prompt is completed before they start their own adventure. Doing so allows them to see how I have also completed the task I am requesting from them.
Step 6 Meaningful Sentences and Transition WordsDeveloping a clear topic and concluding sentence is of the utmost importance. During my next writing blog I will clearly identify different styles of topic and concluding sentence. For now, have your child identify the main point of their writing (topic sentence) and wrap it up with a concise sentence that restates the topic (concluding sentence). Also consider placing transitional words in the plan to help their paper flow. As they start to write, this will blend the sentences together. Transitional words are traditionally different from procedural to narrative as I will cover more in the next blog. For now, try using these words for procedural and narrative writing:
Procedural
First
Next
And Then
Finally
Narrative
At First
Suddenly
Soon
A Short Time Later
Afterward
There are many other methods and unique elements to to add in your writing repertoire. These are just a few ideas to get you started writing. Once you and get your student excited and eager to write, introducing a variety of different planning methods becomes an inventive game. Stay mindful! Remember to motivate your students with positivity and excitement. Cultivate writing as fun and creative. Give one of my methods a try and see what spark of excitement you ignite in your blooming writers. Consider sharing some of your work, I would sure love to see it!
Works Sited:*Auman, Maureen E. 2003. Step-Up to Writing. Longmont, Colorado. Sopris West.
Magic Words
/
This engaging activity was a joy to put together. After designing a couple of spring themed pictures, I was considering ways to incorporate spelling and word practice. With the help of my white crayon, inspiration hit. I wrote their words and letters on the the printed spring themed papers. I then handed each of our kids a "blank" paper and asked them to paint. The pure delight of each child was evident as they revealed letter, words and creative designs. For an art and literacy center, use this fun technique to practice a variety of skills. Here are few that we used:
Inchworm: My preschooler identified upper and lower case letters while my Kindergartner worked on her sight words. My 2nd grader worked on her spelling words.
Flower Power: Using the heart flower petals, I wrote each letter for my 2nd grader to practice blending her spelling words. On the vase, I placed the spelling pattern to help identify the words and decorated with a few embellishments.
Fireflies: For my kindergartner, I place sight words on the wings and thorax of this little critter.
Looking for creative ways to practice spelling and making words this month? Check out these quick and easy projects.
Pool NoodlesA friend of mine tagged me on this interactive learning post from Planning Playtime. I loved the creativity of this project and I decided to give it a try. This craft was sure easy to adapt to my preschool, kindergarten and 2nd grade learners. For my oldest, who is working with common word endings, I wrote her suffixes on a green pool noodle, vowels on pink and consonants on blue. She then used my equalizer sports bars to organize and spell her words. My middle girl, spelled words with blue (consonants) and pink (vowels) noodles and our youngest matched uppercase with lowercase letters.
My Takeaways:
Quick, easy and inexpensive to make
Find the pool noodles at Walmart or your local $ store
Use larger noodles; smaller ones tend to tear easy.
For ease of cutting noodles, use a serrated bread knife.
Only keep the letters out needed for your lesson. To many letters were scattered about and my kids struggled to stay on task.
Could use to string to form a giant word necklace
LegosAnother project I created was using large Duplex Legos to form words. My oldest matched root words to suffixes. Additionally these legos could be used for CVC or larger word blends.
My Notes:
Use an Expo or vis-a-vis to write words/letters
smaller Legos could be for patterns or additional word making activities
Clothes PinsAnother matching activity, that my oldest loved, was pinning the suffix on the root word.
Use masking tape to write letters onto clothespins so they can be reused.
Use cardstock or notecards, something with a bit more weight, to write the words. This will help the clothespins hold.
Topic Sentences
/
Designing a meaningful and eloquent topic sentence sets the tone for the entire expository or narrative essay. Wouldn't it be nice to take the guess work out of creating such a sentence while at the same time having fun? Read this post, I have designed activities that will encourage your writers to do just that; learn through play while creating topic sentences.
Spin the WheelStruggling to get your student to draft a topic sentence? Consider downloading this engaging tool. Divided into eight sections, writers will explore seven styles of topic sentences. The eighth space is reserve for personal choice to allow freedom of expression. Download this wheel on Venture2Learn's Etsy Page.
How could you employ this wheel in the classroom or at home? First, have them spin for a specific style of sentence to adopt in their essay. The classroom writing center could also benefit from this wheel as a quick reference tool for identifying and writing topic sentences. Or, perhaps you will use this as a game to promote fun with writing. Clearly there are many ways to use this handy wheel but most importantly students will be engaged having fun learning to draft beginning sentences. The following topic sentences are covered in the wheel each with starter words and an example:
Love to List
Number Power
Preposition Ponder
Quick Question
Conjunction Junction
Verb Vernacular
Complex Sentences
Fun with Writing Game BoardBring back the fun in writing with a game! Designed just this week to incorporate skills for writing, this short but fun game can be used as a writing center, home school lesson or learning tool. Divided into four categories, questions are grouped into four colors and ready to print on avery 5160 labels. Just download print and stick to notecards, paper or simply cut into rectangles to have an easy and creative game. Surprises await the learners on various note cards. Giggles and fun are guaranteed as kids play this game. Expect the unexpected! Find this game in my Venture2Learn's Etsy Page. Categories covered are:
Topic Sentences
Transitions
Details and Idea Jogger
Fun with Writing
Transition StickersUse this adorable printable tool as a visual for kids working on their transitions. Using the tag line "transitons are the glue"(Auman, Karas, Sage & Tyler, 2003), I have placed transition words onto labels (avery 5160) for stickers. Or, simply print and have kids paste these transitions into their journals. For further clarity, the first 15 glue bottles are traditionally used with procedural writing while the second 15 bottles are for use with narrative stories. Help kids get a kick start on blending their stories together with these delightful glue bottle stickers. Download this tool on Venture2Learn's Etsy Page.
Creative Transition ManipulativesWhat are manipulatives? These tools, most often used with math, reading and science are small objects used to cement visual understanding and assist in solving problems. Why not use them to help teach transitions? Try one of these items with the following tagline:
Cubes: Connect your writing with transitions
Links: Link your story together with transitions
Buttons: Button up your story with colorful transitions.
Have a handful of cubes laying around? Use stickers or write transition words directly onto the cubes. If you're not looking for something permanent, use a vis-a-vie or an expo marker. For links, print the stickers and wrap them around the tool. Buttons are an also easy to write on with a vis-a-vi or place a small sticker. These manipulative are a fun, creative and interactive way to blend transitions into your writing.
ConclusionsIn another post, I will cover conclusions in depth. However, as a side note, I like to outline my conclusion before I begin drafting, just after I have written my topic sentence. Why? Doing so allows me to see and set the goal of my paper. A conclusion is simply revisiting the beginning the writing. Yes, it differs from narrative to expository as I will explore more. But, for now try using one of the following transitions to reword your topic sentence, thereby sketching out your conclusion. Find this printable on Venture2Learn's Etsy Page.
Expository (revisit the topic sentence)
Consequently
Finally
Third
Narrative (revisit a character, or share a feeling)
As a result
Finally
Afterwards
Have Fun!Cultivate positive, excited momentum for young writers as they learn to write clear, concise topic sentence and create fluidity with transitions. Enjoy trying out these activities and games to embrace the fun and enjoyment of the writing process.
Works Referenced:*Auman, Maureen E., Karas, Gwen., Sage, Peg., Tyler, Caela. 2003. Primary Steps Reproducibles, Step-Up to Writing 2nd Edition. Longmont, Colorado. Sopris West.
*Auman, Maureen E. 2003. Step-Up to Writing. Longmont, Colorado. Sopris West.
YAY for Spelling!
/
Pratice, practice, practice... in a meaningful way. Spelling, as a little girl was difficult for me, I didn't understand the rules and dreaded weekly spelling tests. It wasn't until I stated teaching that the English language begin to make sense. With programs such as Linda Mood Bell and Words Their Way I discovered the joy and fun of decoding words. No longer was it a frustration to spell, but I clearly understood the how and why. Teaching spelling (working with words) and writing became fun as I created unique and interesting tools for a variety of leaners.
Daily my classroom would practice a quick mini lesson on the patterns of language which we would then apply to our guided reading. What sorts of activities would I do with my classroom? From Working with Words word building, developing my own word ladders, to creating interactive games and exercising, I would tap into the variety of learning styles. So, how do I apply this method at home? Now that my own children have spelling lists, I work with them on spelling patterns. I also create fun and interactive ways to rehearse and practice their words.
Looking for fun 5 creative ways to practice spelling at home?
1. Dust off your old Scrabble and Boggle Games- Take turns and try to connect as many spelling words as you can with your child. Honestly, I had to strategize a few moves before my daughter in order to make the connections. We flipped over the letters and concentrated on building our scrabble puzzle rather than playing a "real" game of scrabble. Another method is to split the words in half and add up the number tiles for each word. Whoever gets the most points total is the winner.
2. Pre box the words to each spelling word. Tall boxes go with tall letters such as t, f, l, and b. Boxes that dip go with letters such as p, y, j and g. The rest are straight across. See the example below of how I drew my boxes. Your child will then have to use their spacial reasoning to figure out where each word goes and spell them, as you read the words aloud. Have them identify the vowel in a different color.
3. Create your own word ladders giving clues for letters that will change and hints about the word. An example is shown below that I did with my daughter. To much of a challenge? Check the word ladder book. It goes by theme so what ever skill your child is working on, locate and try. The words won't be the same but, the skill will be similar.
4.Do pushups, sit ups, mountain climbers or pretend to shoot hoops, swing or kick as you spell each word. This is a favorite activity in which all my kids participate.
5. Write a story using each spelling word. Or, go on a word hunt within a book to find the words. Having a difficult time finding the words in print, use old newspapers or magazines to cut out letters to recreate the words.
READY...SET....WRITE
/
7 Idea Generators
Motivating children to write and enjoy the process, over several blog posts, I will share my secrets. Put the love of writing back into the hands of young learners.
Finding a topic, how many of us struggle with this essential step in the writing process? Do you have a child that does not enjoy writing or struggles to find the right topic? I can help. Some days ideas and creativity may flow while others we need a little nudge. On those particular days, what can you do to help? Take a look at these 7 idea generators.
Fish Bowl
Have your child dream up a few of their favorite topics. Type or write each idea onto a slip of paper. Keep those brainstorms in a bowl or paper bag. When you see them struggling with a topic, have them "Go Fish" for one of their favorite themes.
Notebook
We have all experienced moments of brilliance when our creativity generates an idea. How many times have we neglected to write that thought down? Later, when we try to recall the notion, we can't remember! Have them take the opportunity to write the idea in a small notebook or a page, in their writing journal, dedicated to new topics. (My oldest daughter keeps her ideas tucked within this old phone.) These ideas, however small, will spark their imagination for writing.
Theme Pull
Working around a theme or project? Generate a variety of words or phrases about that topic. Type or write down those ideas and glue to craft sticks. For added fun, place into decorative container. Have children "draw straws" to spark a creative idea or writing prompt.
Utilize Pinterest (for older children)
Set up a Pinterest writing board. Ether you or your older student can Pin items of interest or phrases that trigger their creative thinking. Use these visuals as a way to prompt their writing and generate interest in a writing theme. Possible ideas for writing could include: designing recipes, drafting DIY building projects, writing clear directions, formal procedural writing and fantastical stories.
Nature Walk
Use their learning style to tap into their creativity. Take your children on a nature walk around the neighborhood, local park or just in your backyard. Have them research sounds, critters they see, objects they feel and explore using all their senses. Consider listing ideas within a set time for a game like approach. Ideas can be drawn, photographed or written in their notebook.
Scholastic Story Scrambler
Children will love using this scholastic webpage for fun writing prompts. Choose adventure, fantasy, sci-fi or scramble, enter your name and age then hit enter. These age appropriate idea generators are fun, interactive and creative.
Make your own comic strip at ReadWriteThink.Org!
Demonstration
Everyone struggles with the writing process. So, whenever teaching writing, I demonstrate how to problem solve a mini dilemma before my students write. Depending on the issue, in this case generating ideas, I pretend to be perplexed on choosing a topic. How do I structure this lesson? I sit down with a blank sheet of paper and walk through the process of generating ideas. I literally talk them through how I pull ideas into my writing by using one of the methods above.
Ready, Set... Write!
Emoji Word Choice
/
One of my favorite tools as a writer is my thesaurus. Stress with finding the right word melts away with this oh so helpful tool. So when I heard my 2nd grade girl was struggling with written expression, I couldn't wait to introduce her to my "pen pal". There are plenty of online thesaurus sites where you can easily type in your word and instantly you have a wealth of synonyms at your fingertips. However, I want my daughter familiar with using guide words and locating her word match.
For a little fun afternoon project, I located my children's thesaurus, found a stash of emoticon stickers and used a set of blank books from the Target dollar bin. My plan, after introducing her to the thesaurus, was to have her create her own reference book that matched her voice and gave her preferred word choices.
This is fun start to her journey into creative expression.
Window Writing
/
Have your students ever dreamed they could enter a painting, be a reporter on TV, travel to an exotic location? Awaken their imagination, welcome them to window writing! These "empty" screen designs inspire and capture the attention of budding writers. Even young preschoolers will enjoy this creative tool. First, imagine anything that you peer through such as an open window (maybe even Santa's workshop), a picture frame, a computer or television. Next, using card stock or large paper, draw your object. Now, cut a large hole "window" in the design. Finally, laminate the entire project! You now have a clear window that can be used for many creative lessons.
Here are a few ideas for window writing designs:
Open Window (You could even create a scene such as beach, mountain, forrest)
Snow Globe
Fortune Teller Ball
Picture Frame
Barn Door
Transportation Window (Bus, Car, Airplane, Helicopter, Train)
Book or magazine
IPad
Empty bottle or container
microwave
oven
There are many ways these could be used in the classroom, however here are some suggestions.
WritingIn writing, use these windows as a prompt to get ideas flowing. Older students can use these screens to cultivate and create a story. While young leaners may choose to draw, with an erasable marker, on the prompt to create their stories. Or, consider this, after the first draft is written, use the window as an editing tool. Have them place their paper behind the screen and revise their work with an expo or vis-a-vis. Final projects can also be framed behind the screen as a eye-catching bulletin board. Wanting to add positivity and encourage your learners, enclose writing behind the prompt then, with an erasable tool, allow complements and positive notes to be written on the window.
PerformanceWanting to foster creative expression through performance? Use these windows to design a student lead performance. Or, have learners use the window as a backdrop while they read their writing aloud. Children can also practice the art of speech with one of these windows then share their work through a performance. Imagine a fun news or weather report, students would enjoy sharing their work. Plus, how fun would it be to film kids and their clever communication?! Certainly, this would motive children to practice reading with fluency and expression.
Creative PlayThe importance of creative play is invaluable. Abundant learning takes place while children are "playing". Incorporate some of the window prompt into their centers and observe them having fun. While listening to kids play, write short stories of their adventures. Create a magical moment and watch their eyes light up as you read back what fun stories you heard them invent. Make these little adventures into personal books to practice reading.
Or, use the window prompts to practice reading words or letters. Put words, letter, phrases or important skills behind the window. Perhaps you want them to incorporate some spelling or vocabulary words into their theme writing. Place it behind the screen thereby drawing more attention to the required skill. You could even consider adding velcro or a slit in the window for an interactive learning center. How cute would it be to have an interactive prompt while writing letters to Santa or his elves. There are so many possibilities for these window writing tools. Have more ideas of how to use these creative prompts, please share! I would love to hear your ideas.
The Bitmoji Classroom-Is it Worth It?
/
The Bitmoji Classroom is popping up on many educators classroom feeds.
Is it worth it?
Should you have a Bitmoji Classroom?
Do you have to be tech savvy to create one?